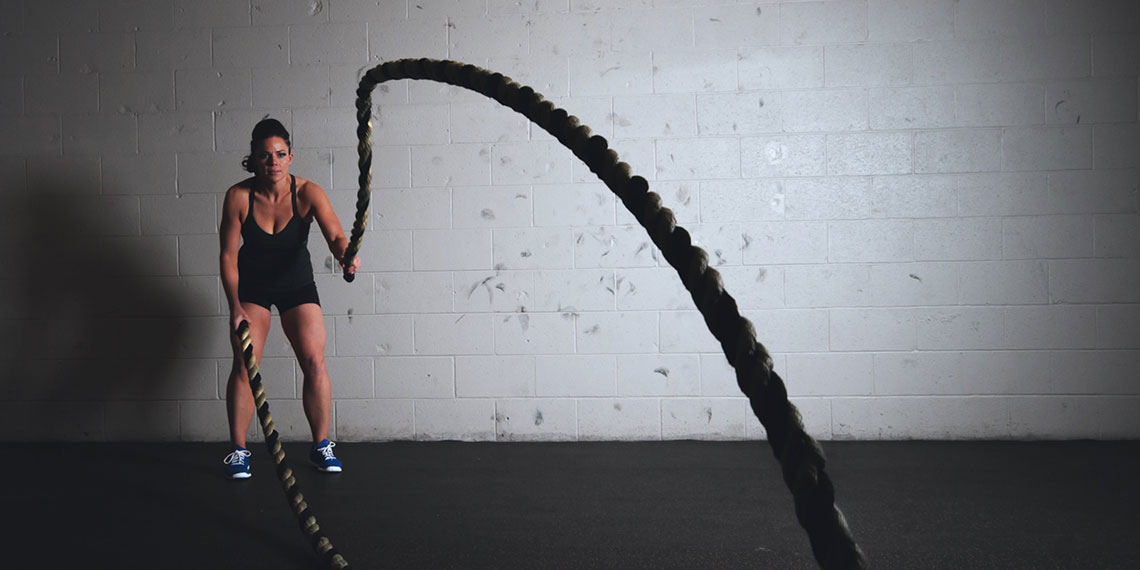
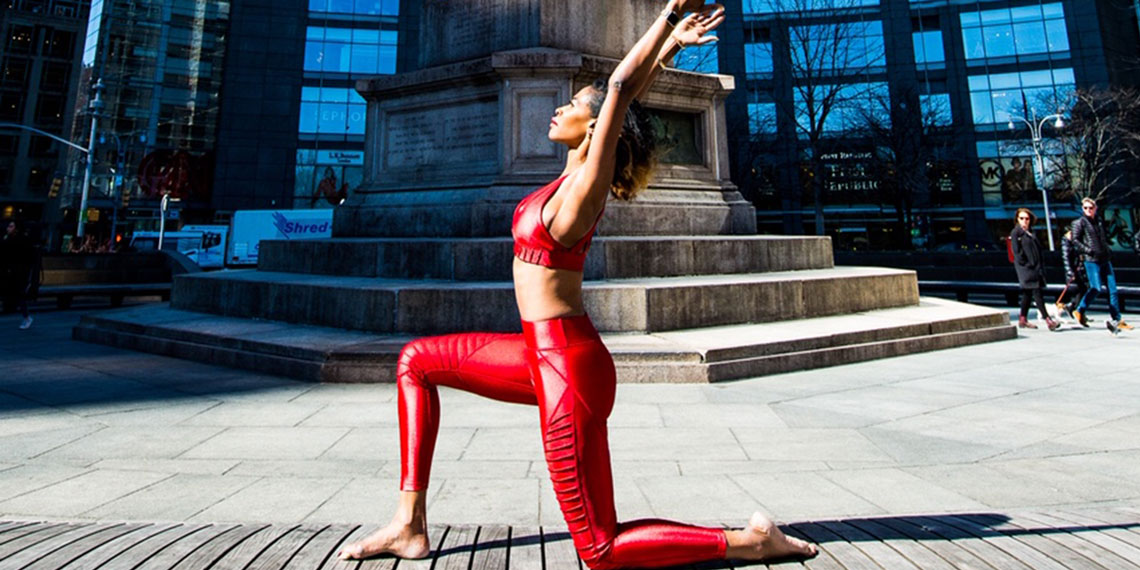
How Many Calories Your Favorite Workout Classes Actually Burn
Group workout classes are great. You’re motivated by the overachieving people in the front row to work harder, but you also don’t feel super sh*tty about yourself because there is usually someone who’s just as lost as you. But even if you’re not perfectly coordinated (me in dance cardio classes), you will likely still be dying at the end of a class, if you’re doing it right. Obviously, not all workout classes are created equal, and some will burn more calories than others. So I did the research to find out if cycling is really kicking your butt, if CrossFit is really worth it, and more. Read on to find out how many calories workout classes burn. For reference purposes, I reported the number of calories burned for a woman who is 155 pounds. So your mileage may vary, but here’s a good reference guide to the calories burned in your favorite group fitness classes.

HIIT

Also known as high-intensity interval training, HIIT classes involve lots of sweating, heavy breathing, and typically burpees. As the name implies, they are structured in intervals of high-intensity workouts. Typically, you push yourself to the maximum for 20 to 90 seconds before taking a short break and doing it all again. Due to the intensity of the workout (say “intensity” again), you can burn up to 900 calories in an hour. The harder you work, the more you’ll burn. Either way, you’ll for sure need a shower and nap after this workout.

Kickboxing

If you want a major confidence boost, take up kickboxing. This high-intensity workout will test your balance, endurance, strength, coordination, and flexibility. Not to mention, you’ll feel like a total badass when you master a mean uppercut. A 155-pound woman could burn around 740 calories in an hour of kickboxing class. Speaking from experience, you’ll work legit every muscle in your body, and I can guarantee you’ll be so sore the next day. Have fun walking upstairs!

Cycling

Personally, cycling is my favorite workout. The high energy and fun music makes me forget about how much the instructor is kicking my ass. According to this calculator, you could burn 637 calories for a one-hour spin class working at mid-intensity (which means that you could still have a conversation). Personally, I can barely breathe midway through a spin class, let alone have a conversation, but sure.

CrossFit

Say what you want about the people who swear by it, but this workout is no joke, and you’re able to burn almost 800 calories in an hour (so I guess those bros are doing something right). It’s a high-intensity, constantly changing workout that involves exercises like push-ups, pull-ups, and squats. Honestly, I don’t feel like I need to explain it further—if you want to know more just go up to the nearest person you know who does CrossFit and breathe in their direction and they’ll tell you all about it.

Circuit Training

Circuit Training

This workout may be hard, but it is never boring. It combines a variety of different exercises to work different muscle groups that you move through with a short or no break in between. Your heart will be racing basically as soon as you start. In a one-hour class (or workout you do yourself, which I’m v impressed you are motivated to do), you could burn up to 547 calories.

Hot Yoga

Well for starters, it’s hot, which some people hate but I personally love. You sweat balls, which always makes me feel like I’m working 10 times harder that I probably am. The heat also helps you release toxins and loosens your muscles so you can have a deeper stretch. For an hour hot yoga session, you could burn up to 500 calories. You can also improve flexibility and reduce stress.

Barre

barre

I don’t think I’ve ever left a barre class when my legs don’t feel like Jell-O. Even though I danced ridiculous hours as a child, these classes are very hard. In case you missed the trend, barre is a combination of ballet, yoga, and pilates poses and exercises to work muscles you never even knew you had (or at least, that’s the case for myself).  You can burn more than 400 calories in an hour class and tone your muscles. These ballet-inspired classes will make you feel like a classy ballerina.

Images: Scott Webb/Unsplash; Giphy (7)
This Type Of Class Is The Hardest F*cking Workout You Will Ever Do

Let me first start off by saying I’m not one of those people who believes in a particular workout like a religion despite exercising religiously—for instance, I have no patience for yoga and certainly don’t believe those small movements and soft sayings are going to yield the six pack I’ve been chasing since high school. I kid you not when I say I’ve tried every workout under the sun: yoga, HIIT, barre, pilates, boxing, spinning in every form they’re offered in NYC. I’ve done Fhitting Room, Barry’s Bootcamp, SoulCycle—I literally could go on and on. When it comes to working out, the only thing I believe in are results.

With that said, I was looking for a class that would complement my personal training sessions in anticipation of my upcoming wedding. And while it took me a good half of my adulthood to find what I was looking for, praise be that I actually found it in the shape of a reformer machine named . No, I’m not talking about that thing you see in introductory pilates classes, I’m talking the real thing that makes you curse under your breath and has your limbs shaking for almost an hour. My goal was to find a low impact full body workout that would get me toned, fast.

Enter , a torture chamber class that will challenge your body as much as your mind (if not more). What goes down in this room is some sh*t I have never experienced, and I truly don’t know if there is anything that I hate and love more than this type of class. While this is hands down the hardest workout I’ve ever done, it is also one of the easiest on your joints since there is little to no impact. So, for all my other cardio haters, rejoice, because there’s no jumping or running during any part and your knees won’t hurt.

You spend the entire duration of the class on the machine, which is broken up into three different parts: a back platform and a front platform on either end, and a middle part, referred to as the carriage, which moves in either direction. How difficult it is to move the carriage depends on how many or how little springs you have on (see image above). There are various weights of spring load which can be adjusted throughout the entire class. There are specific moves that target different areas: think moving lunges for thighs, twisted v-ups for obliques, and kneeling shoulder presses for arms.

The core tenet for this workout is time under tension. During class, you do a series of exercises based off of planks, squats, and lunges with lots of variety to break down your muscle fibers all the way to second stage muscle failure, specifically, your slow twitch muscle fibers. This creates micro tears/trauma, which is why the workout hurts so f*cking much. But unlike most fitness classes, you will never once wonder to yourself, “is this sh*t actually working?” like I do every 30 seconds in a Pure Barre class. After class, your body will go into repair mode to heal the muscles, so they grow back stronger. During this time, your metabolism is heightened for the next 24-48 hours.


View this post on Instagram


A post shared by (@solidcore) on

The workout challenges you to stop focusing on calories, and to focus instead on the development of muscles you’re creating. You are literally making yourself stronger, but I feel like the fact that you can endure this type of tension for 50 minutes straight will challenge your mind more than your body. Your brain will quit working out before your body actually will, so during these extreme moments of tension, you will need to mentally fight against yourself, something that you can take with you outside the classroom that will help you way past the 24-48 hours the workout will take you.

You don’t need to take a million classes to see results either. “If you can only do 2 times per week, we guarantee you will see and feel changes in your body. In fact, I don’t even take class every single day,” explains Senior Master Coach Jacob Griffin who has been working for since their first studio opened in Washington, DC. “If you choose to show up and work hard for the 50 minutes you choose to be here, you’re set.” P.S. Jacob used to teach Michelle Obama, and we all know what her arms look like so…

Images: solidcore / Instagram

4 Pilates Moves To Tone Your Butt & Legs

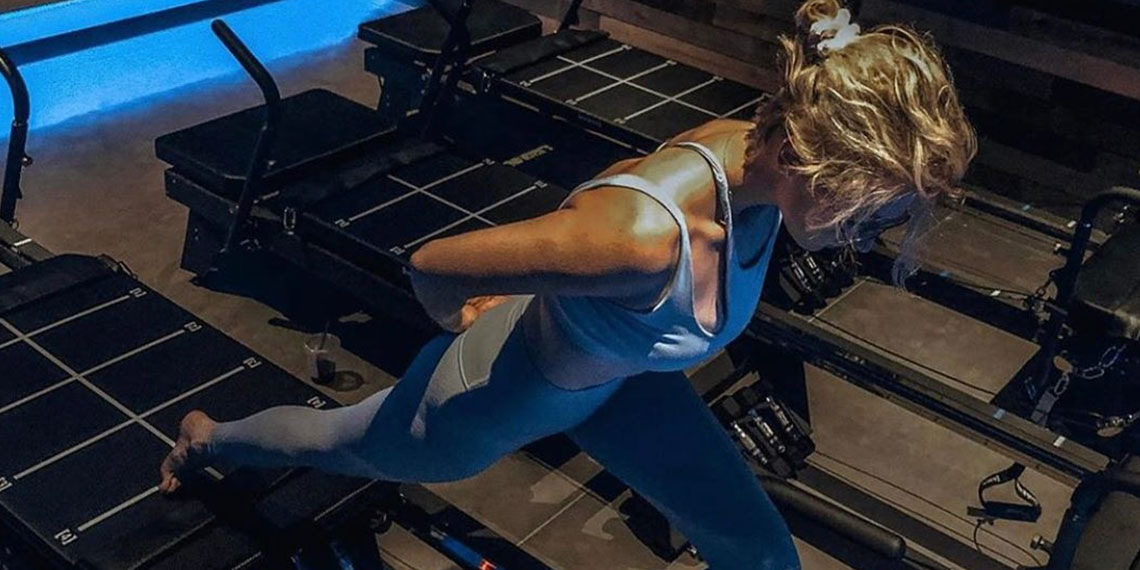
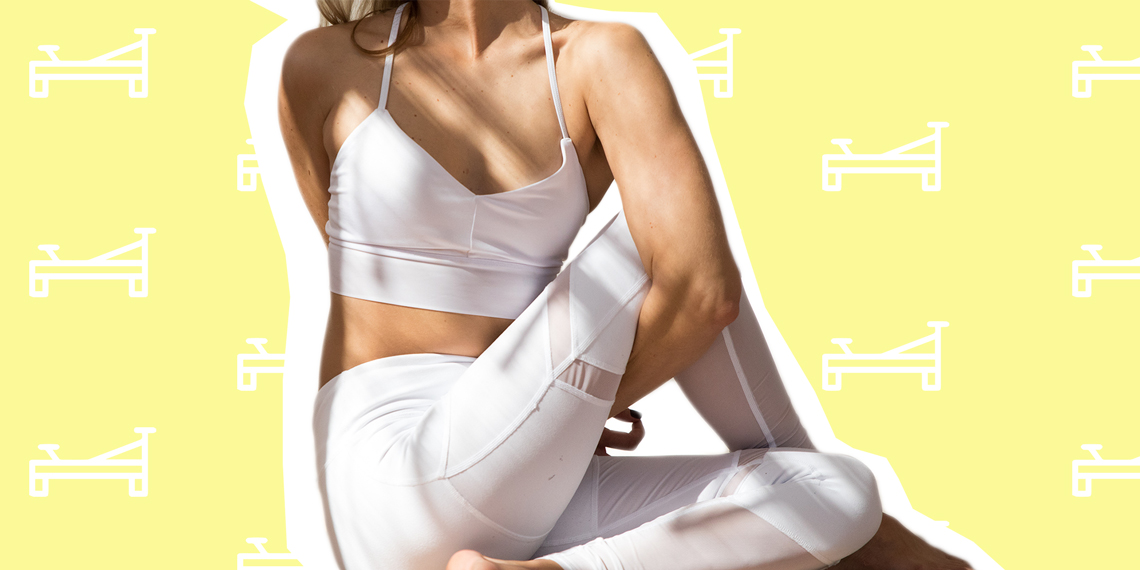
All these exercises strengthen butts and legs at the same, but most importantly, without a strong core (which, in pilates, we refer to as The Powerhouse), your shoulder and hips will tighten as a result of bearing the brunt weight of your body.

These exercises are typically performed in a systematic order of the classical pilates to be more effective. Before taking on any of these exercises, make sure you’ve already exercised. For example, jogging, bicycling, Soulcycle, etc. would all work. This is to ensure that your muscles and joints are supple, to sustain and keep the form of these exercises with consistency.

Single Legs Kicks

Setup: Lie flat on your stomach, nose to the mat, and place your palms in line with your ears. Engage your abs, press the floor away with your palms into straight arms, lift your chest up and stretch it forward, bending the elbows just under your shoulders, with each hand in a fist to anchor you, and your head in line with your spine, eyes leveled.

Movement:  Kick the heel of your foot to your bottom in a dynamic motion like “kick kick” and switch, “kick kick” and switch. As you kick your heels, keep your hips and butt stable by pressing the hip flexors to that mat, zip the inner thighs, and keep the knees together. Engage your glutes, and kick for 3 sets. Do not let your booty pop up, hence why you press the hips to the mat. Be mindful not to let your lower back collapse either, which is why your abs must be engaged with a pull in and up.

Modifications: Lower your abs down to the mat with your chest up and forward, with your elbows slightly forward, and your hands in a fist in line with your elbows, and kick your heels to your bottom.

Double Leg Kick

The double leg kick is the next progression after double kicks.

Setup: Remain flat on your abs after the single leg kicks, with your chest down, on the right side of the face on the mat. Keep your neck long, and stack the palms on top of each other in the small of your back, ideally in the mid back close to the shoulder blades.

Movement: Kick the heels of your feet to your butt, 1-2-3. Lift the chest forward, then stretch and reach the arms behind you, over your butt and hands folded, to further open your chest. Then, turn your head to the left side of the face, lift and reach arms again, and repeat. Abs must be engaged, and legs stretched long when straight. Repeat 3 sets.

Modifications: If your shoulders or arms are tight, and it’s too difficult to stack them on top of your lower back, rest the back of your hands on top of your butt or on the mat when kicking your heels to the bottom, and lift your arms up in line with your hips when you lift your chest up and forward.

Leg Pull down

Setup: In a plank position, put your elbows and wrist right under your shoulders, with your legs straightened out, and the heels of your feet together, toes apart, navel to spine.

Movement: Pull navel to spine. Flex toes to rock back in a straight line, and point your toes to lengthen your whole frame forward. Keep pulling your navel to the spine, and resist the gravity of your back collapsing down into the joints by lifting back up to the sky. After 3 sets of repetitions, lift the right leg and rock back and forth and repeat on the left side.

Modifications: If balancing your upper body on your palms is too much pressure on the joints, bend the elbows and rock back and forth on elbows with hands in a fist. Just remember to resist the gravity of the body upwards. Imagine you’re balancing a tray with glass on it on your back, and don’t let it slip off while moving. You have to balance it by keeping your back straight and level.

Leg Pull Up

The leg pull up is the next profession from leg pull down.

Setup: Start by sitting on the mat, knees bent, feet flat on the mat, arms stretched behind in line with shoulders, and palms on the mat. Lift your hips up in line with your knees and straighten the legs in front in two steps, heels together and toes apart.

Movement: Engage your abs and lift your right leg up, pointing the toes. Do not scrunch your feet, reach them like you’re trying touch something in front of you, and maintain the height on of your hips as you lower the leg down the mat. Flexing, lift the left leg, reaching the toes, and repeat the same motion.  Repeat for 3 sets.

Modifications: To modify this exercise, keep your hips up, bend your knees with your feet flat on the floor and your feet and knees together. Keeping your knees in line with your ankles, progress to extend the right leg straight up from and in line with the hips, and with both knees leveled in even height, lower the right leg straight down to the mat to the height of the left ankle. Lift it back up to the knee’s height, bend the knee, and switch to the left. Repeat the same exercise as the right leg. Repeat this in 3-5 sets.

Caution: This exercise is very challenging on the hips and shoulders, as you can stiffen up when locking your joints. The key to sustaining this exercise is to keep the heaviest parts of the trunk (i.e. chest and hips) up.

Images: Michele Paniz Photography

7 Exercise Mistakes That Are Sabotaging Your Workout

Going to the gym f*cking blows. Half the time I don’t know what I’m doing, so I just resort to hopping on the elliptical for 30 minutes before calling it a day. Not to mention, it’s sweaty, painful, annoying, and honestly, I’d rather be on my couch watching SVU reruns. That’s why nine times out of ten, I’ll fork over the $40+ and just sign up for a bougie workout class where I can have an instructor tell me what to do, use the studio’s freebie dry shampoo and face wash, post proof I was there on my Insta story, and continue avoiding an actual gym like the plague. And that’s coming from me, a Pilates instructor, who yes, can also hate working out just as much as you do. If you’re like me and want to make sure you’re getting your money’s worth of your fancy workout class, don’t make these exercise mistakes after you sign up, because you’re going to end up sabotaging yourself.

1. You’re Not Properly Fueling Before Class

Never go to class on an empty stomach. You’ll be groggy, irritated, and maybe even a little hangry. You can’t expect your body to push through your workout and give it your all if you’re operating on zero fuel. Grab a banana and some peanut butter—any food that will give you quick carbs for a boost of energy—and eat 30 minutes to an hour before your class to give your body what it needs.

2. You Won’t Get Off Your Phone

Yes, Twitter is funny as sh*t, but pull yourself away from your tech for the entire duration of a class. If you need to take a quick selfie or snap a pic for some ~content~ that’s fine, but do it before class or as soon as it’s over. It’s super rude to your instructor and other class attendees, and if you can’t pull yourself away from your iPhone for an hour you won’t be able to focus on your workout and will miss out on reps. And I promise you that your ex does not give a sh*t you made it to your fourth Barry’s class in the past week… if he’s still watching your story.

3. You’re Wearing The Wrong Clothes

You don’t need to show up wearing a sports bra, but wear clothes you feel confident in and that are at least semi-fitted. If your clothes are too baggy, your instructor won’t be able to check your form, you’ll lose out on maximizing your reps, and it can even lead to injuries. Avoid your college sorority T-shirts and think of it as an excuse to hit up Lululemon for some quality workout gear.

4. You Don’t Tell Your Instructor You’re Injured

First of all, kudos to you for even getting to class in the first place. But don’t be so badass that you avoid telling your instructor you have something going on. Even if you don’t think it’s anything, letting your instructor know something doesn’t feel right—or if you have a legit injury that’s been checked by your doctor—is always the move. Your instructor should be able to modify any exercises for you, and can even give you a few pointers on how to rehab your injuries.

5. You Won’t STFU

If you’re hitting up a class with a friend, great. But stop talking sh*t/gossiping/stalking your Ship matches together as soon as class starts. If you really need to catch up, grab green juice after class and chat there. Or if you know that you won’t be able to shut up when you’re together, take the class on your own and make plans with them later.

6. You Arrive Late Or Leave Early

Yes, the MTA is a bitch and a half and will probably make you late at one time or another, but don’t let make you late to your workout class. Not only could you lose your class credit or be charged by the studio (ugh, annoying), but it can also jeopardize your safety. 99 percent of classes start and end with a warm up and cool down and yeah, you should absolutely do them. They are crucial to helping your body prepare for exercises later in class, and they’ll help relieve any soreness or tightness after your workout. IMO, not stretching after a spin class should be a felony.

7. You’re Not Eating After Class

After you’re done hitting a high-impact class, the first thing you should do is eat a good meal with protein. Avoid a sugary smoothie (yes, even it’s made with mostly fruit) and try a good salad topped with tofu, beans, or another lean protein, or a sandwich you can take on the go. Yes, working out can help you lose weight, but only proper nutrition can make you fit and help you reach your goals. Don’t let the past 45 minutes you spent sweating out last night’s vodka sodas be in vain!

Images: bruce mars / Unsplash; Giphy (7)

8 Pilates Exercises To Tone Your Abs

As soon as the weather hits 60 degrees, all I want to do is wear a bikini, sip on prosecco, and eat some watermelon as I scroll through Instagram, poolside. Even if swimsuit weather is still a whopping three(ish) months away, it’s the time of year where we all start to evaluate juuuuuust how confident we feel strapping on our most revealing attire and showing off our beach bodies.

As a Pilates instructor, I frequently get requests for stronger, more toned abs, especially the obliques. Since Pilates was created specifically with the idea that your core is the powerhouse of the body, almost every exercise in mat or reformer Pilates will get your abdominals fired up. And while a lot of us want toned abs to show off in a strategically taken thirst trap for our followers, a strong core is more important to help our bodies function properly, improve posture, and stop low back pain as we sit at our desks all day. If you’re looking to get as strong as possible before Memorial Day weekend hits, here are the best eight ab exercises to try without leaving your apartment:

The Plank

Your basic plank is one of the best exercises ever invented, IMO. You’ll work your full body when you’re correctly executing a plank. Keep your hands stacked right underneath your shoulders, keeping palms (or forearms) pressing down into the floor to help stabilize your shoulder girdle. Pull your belly button into your spine and think about lengthening your body from the backs of the heels through the crown of the head. This will help find your glutes while finding the isometric contraction of the muscles.

Hold your plank for as long as you can! If you’re new to planks, start by holding this position for 30 seconds (remember to continuously breathe!) and then work up to one or two minute intervals.

The Plank Plus Mountain Climbers

Once you’ve mastered just holding your basic plank, it’s time to up the ante. While a basic plank will definitely help you strengthen your transverse abdominals (the corset-like muscles that wrap around your middle), adding mountain climbers will challenge and tone your obliques (the “side” abdominals the Dua Lipa flaunts in every single crop top).

View this post on Instagram

Back on sunnier turf for the 3rd time in 3 weeks! Wrapping up my 2018 nicely with one last shoot before heading back to London❄️❄️❄️

A post shared by Dua Lipa (@dualipa) on

Add mountain climber variations by bringing your knee to your elbow. Bringing your knee inside of your elbow will work your internal obliques, bringing it outside of your elbow will work your external obliques, and bringing it diagonally to your opposite elbow will help your oblique slings work congruently.

As you get fancy with your footwork, don’t lose shoulder stability and let your chest collapse. This can result in dumping the work of the exercise into your lower back, causing pain. Think about pressing into your palms and pushing into the floor to help keep your scapula (the “chicken wing” part of your shoulder blades) secure.

If you feel yourself arching your low back or if you feel a pinching sensation, work on your basic plank form until you feel confident enough to add the mountain climbers back in.

See if you can challenge yourself to hold your plank for at least one minute as you add your mountain climbers.

Bird Dog Plus Windshield Wipers

This exercise seems innocent enough, but be prepared to fall over on your first attempt. You can start by getting into an all fours position, knees stacked underneath hips, hands underneath shoulders.

Next, lift opposite arm and opposite leg off of the floor. Think about reaching both limbs as far as possible in opposite directions. Press your supporting hand down into the ground to help keep your shoulder supported. Hips should be level (you can place a book on your low back to see if your hips are squared. If it falls off, you’ll need to adjust). To finish the movement, move each limb to their respective sides 2-3 inches like a windshield wiper. You’ll want to keep it small. Pull it back into your starting position. That’s one rep. You should feel your obliques and transverse abdominals fire on to help maintain stability and balance. Aim for 8-10 reps per side.

Crisscross

You’ve probably done “bicycles” before, but chances are, your form is incorrect. The objective of Crisscross—the official term for the exercise in Pilates—is to find your oblique slings. When done too quickly or with poor form, you’re not squeezing the most you can out of the exercise.

First, move slowly. A lot of times I see clients whip these out as fast as they can, but moving with purpose will actually help you find more work in the exercise, which means efficiency! Pretend you’re moving through peanut butter as you start by coming up into a mini ab curl. Then think about twisting your armpit over to your opposite hip point while simultaneously extending the leg on the same side you’re twisting from.  

Instead of pulling your knee closer into your face, think of it staying in space while twisting your upper body to it. You want your pelvis and lower body to stay as still as possible. Imagine your upper body ringing out like a wet towel, finding every inch of rotation through your thoracic spine.

See if you can work continuously for 30 seconds, alternating sides.

The Side Plank Plus Mountain Climbers

In case you didn’t notice, I LOVE planks. Side planks are even better because they’re super hard and super humbling, even if you work out a ton.

Before you add mountain climbers, make sure you can maintain a strong side plank. Similarly to a regular plank, you should feel like your bottom shoulder is stable as it bears the weight of your upper body. Your elbow (or hand) should be directly underneath your shoulder, and as you press into your forearm, avoid keeping all of your weight in the elbow—I know it’s tempting. Think of the bottom waist lifting up to help recruit your obliques into the exercise. This will help take some of the workload off from your shoulder. Keep your feet flexed. You can have them stacked ankle over ankle or scissored, totally your preference.

If a side plank is super challenging for you, you can also leave your top hand (or fingertips for lighter support) on the ground to help stabilize. Just make sure you’re not rounding your top shoulder too much. Your chest should be squared to the side of the room.

Once you feel confident with your plank form, take your top hand behind your head and lift your top leg into a tabletop position. Think of it “crunching” into your waist to fire up your top oblique. You might feel the outside of your butt/hip area start to work. Totally normal! That’s where your gluteus medius and gluteus minimus are—two helper muscles for your gluteus maximus, aka your booty! They’re jumping in to help bear the support of the side plank.

Try holding your side plank for 30 seconds and fit in as many mountain climbers as you can.

Double Leg Stretch

The double leg stretch is a great way to find the hard-to-reach low abs. This will challenge your entire core while also feeling fun. (OK, maybe it’s just me who thinks chillin’ in a little ball is fun…)

To begin, lie down on your back and curl up into the tiniest little fetal position you can. Let your knees come into your chest and think of your tailbone tucking under (this will protect your low back) and place your hands lightly on your shins. Take an inhale to prepare and as you exhale, shoot both arms and legs out in opposite directions. Circle your arms back to your shins. That’s one rep. The lower you aim your legs, the harder it’ll be for your abdominals. Pick what feels most challenging to your body, but if you feel a pinch in your low back, aim your legs higher toward the ceiling.

Repeat for 10-12 reps.

Scissors

The Scissors move is a little twist on the crisscross. Instead of staying up into an ab curl, let your upper body stay down and place your hands on either side of your body in a low “V” shape. Spread out your fingertips and make sure you’re pressing into the ground (this will help give you more support from your triceps). Take your legs up toward the ceiling and begin by alternating the legs like a pair of scissors—oooh, see what we did there?—on a 45-degree angle. Again, the lower you go with your legs, the more challenging it’ll be for your abdominals.

If you feel a pinch in your low back at any point for this exercise, make a diamond shape with your hands and place them underneath your sacrum (right between your low back and your tailbone). This will help keep your pelvis supported and make you’re working safely.

Try to work continuously for 30 seconds.

The Rollup

Last but not least, the roll up! The next time you find yourself lying on the floor hungover, trying to find the meaning of life, try getting up using only your abdominals.

Start by lying flat on your back and place a little pressure into your heels. This will help you “push” against gravity. Bring your arms above your shoulders, palms facing in. Inhale to prepare, exhale to begin, nodding the chin toward your chest as you roll up through your spine, pulling your belly button in toward your middle like you’re trying to zip your tightest pair of jeans. Arrive seated on your sitz bones, the bony parts of your butt. Inhale again, and exhale as you reverse the direction, returning to the starting position. That’s one rep.

Go for 8-10 reps.

Images: Emi Gutgold

3 Signs You Need A New Workout Routine

When you’re already going to the trouble of working out, it can feel like unfathomable betrayal to hear that you should, in fact, be doing a completely different workout. Or at least, that’s the logic I once used to justify doing nothing but yoga for six months, while slowly ceasing to fit into my pants. As someone who really wants to be fit but is decidedly not an athlete, I’ve spent a of time and energy on different gyms, classes, and even trainers and physical therapists over the years, trying to find the perfect workout that would turn me into a *fit person* once and for all. As all those professionals have explained to me repeatedly, not all workouts are created equal. What’s more, switching up your workout routine has consistently proven to show better results. So, while I reluctantly follow this advice myself, here are my past trainers’, physical therapists, and preferred internet authority’s tips for knowing when it’s time for a new workout routine.

1. You’re Not Getting Sore Anymore

Sorry! But also, not really because you should know this. If a workout stops making you sore, it’s not a sign that you have ascended to a new level of athleticism in which your muscles are no longer capable of strain. It does probably mean that you have strengthened the specific muscles involved in this particular workout (congrats!). But if you don’t up the difficulty of the workout, or switch out the muscles you’re working on, you won’t keep seeing results. At best, you’ll maintain the very specific strength you’ve gained. But even that isn’t a guarantee, since you’re continuing to do a workout that was appropriate (and difficult!) for you in a less fit state. Trainer Faheem Mujahid explains it as your body realizing “it doesn’t need to expend as much energy anymore:” meaning you burn fewer calories, get less tired, and are less likely to feel sore. Time to level up, b*tch!

2. You’re Getting *Too* Sore

The flip side of the whole soreness thing is that you have to be careful not to overdo it. There’s a difference between it hurting when you laugh the day after an ab routine and needing to strap on a knee brace every time you leave the gym. Fitness instructor Trish DaCosta puts it plainly: “A reoccurring injury or too many injuries is often a sign we’re doing too much of an exercise program.” Pulled muscles, joint pain, or persistent aches are clear signs that your body needs a break. Injuries aside, extreme soreness—or persistent soreness in only a few, select places—also mean you should switch out your routine, or at least add some variety. Trainer Jessica Thiefels stresses the importance of making sure your body feels “balanced in strength,” and adds that “working the same muscles, time and time again” is a bad idea. Muscles need rest periods in order to get stronger; so you’re really just robbing yourself of #gainz if every day is focused on the same body part.

Obvs, if you’re repeating the same workout over and over it’s because you like it, and I get that it’s tough to motivate yourself to make the switch. I once spent two weeks obsessed with barre and loving my life. Then I promptly re-pulled an old thigh injury, and my physical therapist at the time told me that barre was “the worst thing” I could do for my body.  The fact that I had just purchased both a “barre so hard” tank and a month-long barre studio membership apparently meant nothing to her. As much as I was dying to be a fancy barre girl, I had to accept that my body just wasn’t built to benefit most from that particular workout.

Me to my useless barre studio membership:

3. You’re Not Getting The Results You Want

So, this goes back to my whole “only doing yoga” period in time—despite feeling like I was gaining weight, or at least sort of…spreading out. Before my yoga phase, I’d been getting most of my workouts in at the gym, where I lifted weights and ran intervals on the treadmill. Then, I moved to NYC and decided a gym was a luxury I could no longer afford. Even though I’d read countless times that yoga is not the most effective calorie-torching workout out there (particularly not when done for 15 minutes at a time in one’s living room), I hated the idea that completing any workout wasn’t enough for my stupid body. I felt more flexible and balanced for sure—but I felt like I was losing muscle, and my clothes weren’t fitting as well.

The point here? Don’t be like me! Yes, some exercise is better than no exercise at all. But that doesn’t mean you can go on a jog and expect your triceps to be more defined after. DaCosta notes the importance of seeing “continued progress” from your workouts, which could come in any of the following forms: “more muscle definition, decreased body fat, more energy, stronger lifts, faster recovery times, weight loss, faster pace, etc.” While yoga was pushing me on some of those fronts, it wasn’t satisfying others. For a fully varied workout routine that pushes you on all these fronts, Mujahid recommends trying for a mix of “cardiovascular, strength, agility and flexibility sessions,” making sure you’re “hitting every muscle group” in a week’s worth of workouts.

If that sounds totally unattainable to you (same girl), take some comfort in knowing a lot of these categories overlap. For example, a HIIT workout could be your lower body workout, and combines a cardiovascular and strength workout. Then you could work your upper body with yoga on alternate days, which would count as your agility and flexibility sessions. Throw in an ab day and you’re done for the week. (And if that sounds like a month’s worth of workouts to you, once again I say SAME GIRL. I’m just the messenger for what the pros are recommending.)

Me during my yoga phase:*

*To be clear, yoga absolutely can and does help people with all kinds of body goals. But my refusal to do any other workout meant I really hit a wall.

This article is not meant to shame anyone out of the workout routine that they’re doing. Everyone who has broken a sweat (on purpose) in the past week: I am proud of you. But I also know firsthand how frustrating it can be to feel like you’re making a huge effort and not getting anything for it. If anything, this article will hopefully inspire you to make a change and find the workout that leaves you sore, satisfied, and not feeling like you need a wheelchair. Everyone’s body is different, and once you find the (healthily varied & not at all overwhelming) routine that works for you, working out will feel 1000% more worth it. I promise.

Images: Giphy (3); Pexels / bruce mars

6 Pilates Exercises That Will Tone Your Butt And Abs

I love spending $34 on a workout class as much as the next financially careless millennial, but honestly, you can get just as good of a workout by yourself in the gym or at home if you want to. Pilates classes are amazing because you have the help of a certified instructor, but if you know some of the basic moves, you can do them on your own without a room full of toned women in matching Outdoor Voices leggings. These six Pilates exercises are simple enough to do on your own, and you don’t need any fancy equipment to get a good workout. Add these moves into your regular workout routine to switch it up, or do all six together as a total Pilates circuit. Here are the moves for the Pilates bod you’ve always wanted.

1. Plank Rocks

Plank rocks are exactly what they sound like, but for some reason, they’re so much harder than holding a regular plank. The idea here is to start in a high plank position with your shoulders stacked over your wrists and your core engaged. Then, using the tiniest motion from your toes to your shoulders, rock your body back and forth, feeling the burn in your abs the whole time. This is a small, controlled movement, so your body should only be moving a couple inches toward your hands, and then a couple inches back toward your heels. Think about drawing your belly button in toward your spine and keeping your butt low the whole time. Don’t cheat yourself.

2. Glute Bridges

This is one of those Pilates exercises that you probably didn’t even know was from Pilates. The glute bride is a simple move, but if you’re doing it right, you’ll feel the burn in your butt and hamstrings pretty quickly. Start lying on your back with your legs hip-width apart, your knees bent, and your feet flat on the floor. You can keep your hands on the floor next to you, or raise them toward the sky to make it harder. Then, keeping your feet on the ground, lift your pelvis off the floor and squeeze your butt at the top, holding for a second before lowering down to the ground. If you’re advanced, you can also do this with one leg off the floor to really target each part of your butt separately.

3. The Hundred

This looks like a standard boat pose, but it’s actually so much harder because the idea is to pulse your hands, literally, a hundred times. Hence the name. This move is a Pilates staple because it works your abs and tests your stability and endurance at the same time. The Hundred refers to the 100 beats you hold the pose for, but if you’re a beginner, start with 50 and we won’t tell on you. Start in a boat pose with your tail bone and lower back on the floor and your legs and upper body elevated. Then, keep your arms out toward your sides and pulse up and down, feeling it in your core. FYI: be careful with your head placement on this one. You want to keep your chin slightly tucked, as if you’re holding a tennis ball on your chest. Don’t start looking up and taking the pressure off of your core.

4. Kneeling Leg Lifts

This exercise is literally the reason Pilates instructors have the perkiest butts ever. Well, maybe also genetics and years of experience, but you get the point. It works. Kneeling leg lifts are one of the only lower body moves that are just as effective without any weights, so the key is to think about activating your glutes and squeezing on each rep instead of just kicking around by using momentum. Keeping your weight on your forearms and knees, lift one leg straight up behind you in a 90-degree angle so your heel is facing towards the ceiling. Squeeze your butt cheek at the top each time, and then switch to the other leg after 10 reps. You can also hold for a few seconds at the end or add a pulse.


5. Kneeling Side Leg Twists

The kneeling side leg twist sounds complicated, but you’re basically working three muscle groups in one movement: abs, arms, and legs. AKA, it’s a winner. Kneel on the right leg with your left leg extended out to the side, and keep your right arm supporting you with your palm on the floor under your right shoulder. Lift your leg and your left arm up to the sky, and then, as you lower your leg back to the mat, thread your left arm under your waist to twist toward the floor. You want to make sure that when you twist your torso, you’re essentially crunching your oblique with the help of your arm. After 30 seconds to a minute, switch to the other side.

6. The Teaser

IDK why this is called the teaser, but Pilates teachers love it, and it’s because it literally annihilates your core. Doesn’t sound like a tease to me. Start by lying on the ground with your knees bent and your feet on the floor. Then, reach out your arms and lift your legs off the floor in a 90-degree angle. Lift your upper body off of the floor using your abs, and then straighten out your legs at the top. Think about lifting your head and shoulders up in one movement, trying to create a V-shape with your torso and legs. Then, roll back onto your back and bend your knees again. Aim for 15 reps.

Images: Form, Unsplash (1), Giphy (5), Pinterest (1)

6 Underrated Ab Exercises You Need To Add To Your Workout Routine

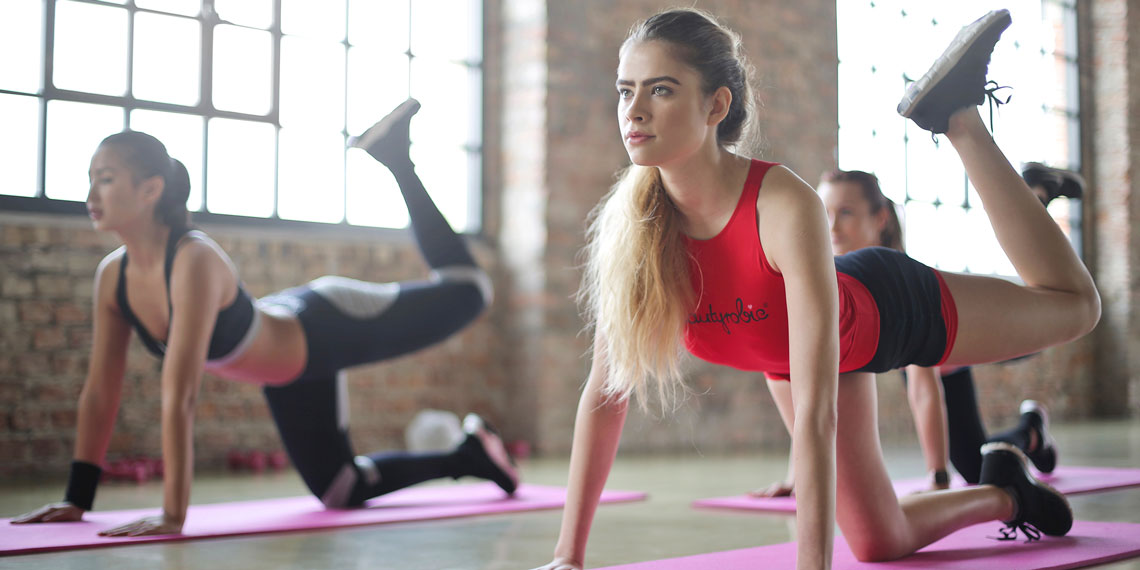
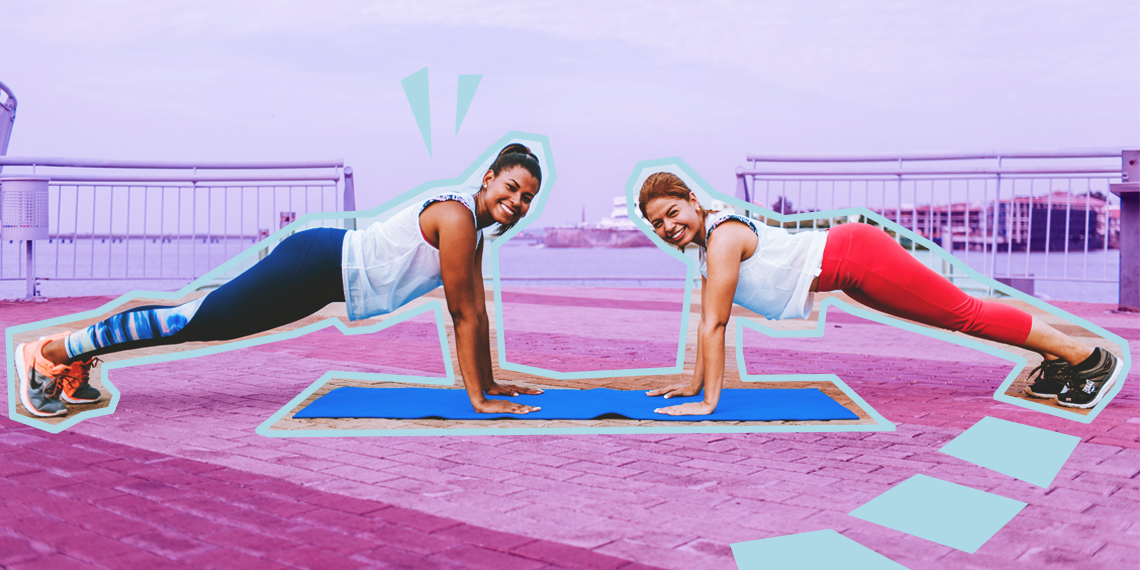
People tend to save ab workouts for like, 10 minutes before spring break when you realize your juice cleanse was pointless so you resort to a few crunches and a 30-second plank.
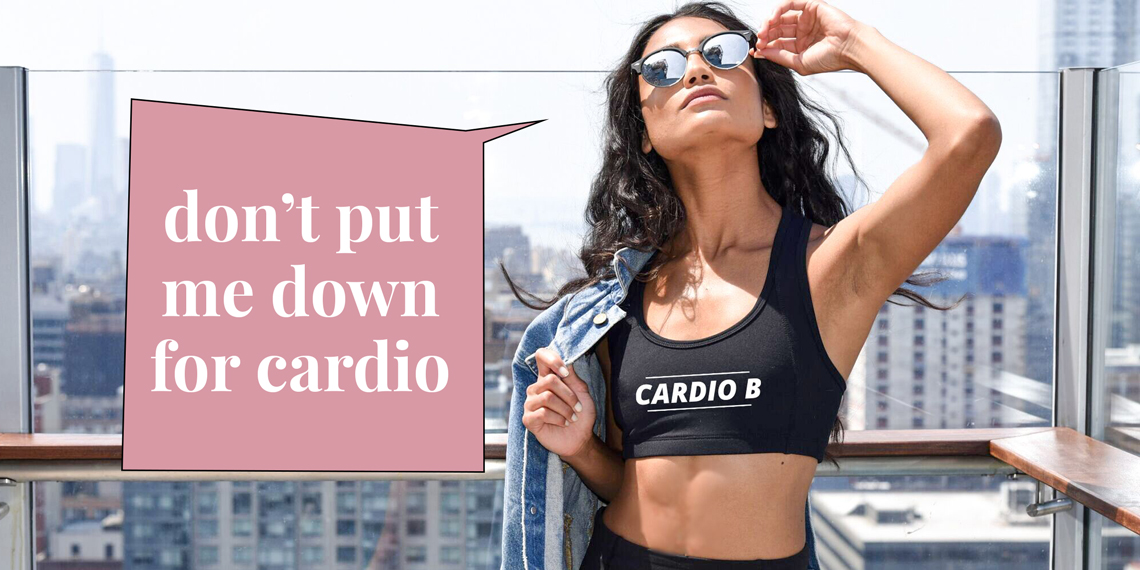
 Most people don’t know that working your abs is about so much more than getting a visible six-pack in your bikini. In fact, all the crunches in the world prob wouldn’t give you those sort of results. Having real core strength makes every other workout easier and helps you push yourself harder, burning even more calories. If you’re bored of your classic scissor kicks and can’t do another sit-up, try these underrated ab moves that will help strengthen your core and tone your abs. You won’t be able to laugh tomorrow, but like, at least you have an excuse for your resting betch face

1. Bear Crawl

The bear crawl is a killer ab move if you’re doing it right, so make sure to feel your abs engaged the entire time. The idea is to stack your shoulders over your wrists like you’re about to hold a plank, but then bring your knees under your hips and raise them just an inch or so off the ground, keeping your back flat and your core tight. At this point you should look like a bear. Get it? Now, start “crawling” forward (Right arm/left foot, etc. Like a bear!) for as far as you can before reversing backwards. This move kills because it engages your lower abs and ensures that your butt isn’t sinking too low and taking away from your ab activation. Use the space you have, or do six to eight “steps.”

2. Army Crawl

For this move you’ll need gliders or two towels and a floor that allows you to move. Usually the regular wooden floor in the group class room of the gym is perfect. Put one foot on each glider or towel, and then get into a forearm plank, with your hands directly under your head. In the plank position, crawl with your forearms all the way forward, and then backward. You’re basically pulling your core with your arms, and you have to keep your hips square the entire time without swaying. Think about keeping a tight core and literally moving your body with only your midsection. Set a 20- or 30-second timer and do the crawls in intervals with breaks in between.

These people aren’t using sliders, because they’re poor. But you get the idea.

3. Ab Wheel Rollout

Most gyms have an ab wheel lying around, and people usually ignore it because they either don’t know how to use it or they think their own bodyweight exercises are more effective. The ab wheel is a hidden gem, and using it in your ab workouts will be an actual game changer. Start on your knees with the wheel in front of you. Hold onto the handles, and roll the wheel outward, bringing your body out as far as it can go without caving in your back. Keep your abs tight as you roll outward, and then roll the wheel back in. Start with 5 reps and then try 10 once you start building strength in your core.

4. One-Handed Plank

The one-handed plank is one of those moves that seems like it would be easy, but once you try to get into position, you realize how much control you need to hold it for even 10 seconds. Just as you’d think, this move is a regular plank, but you only use one hand, so try to do 20 seconds on your right side and then 20 seconds on your left. It’s easier to start with your hand centered in front of your chest, but try to work it back out to under your shoulder as you get stronger. The idea is to keep your body square to the ground without raising your hips on one side. It’s not a side plank, so you shouldn’t be using your obliques. The point is to engage your entire core the whole time to stay straight and tight on each side.

5. Pike-Ups

Pike-ups can be done on the same gliders that you used with your army crawls, but a lot of people do them on TRX bands by putting your feet into the strap handles. Either way, the idea here is to start in a high plank position and then slowly bring your feet down toward your head while the top of your head rotates toward the ground, creating an upside down V-shape with your body. Your head should end up in between your arms, looking directly behind you, almost like you’re doing a handstand with your feet supported. It’s important to NOT bend your knees and to use your abs to bring your legs in. Do 8-10 slow reps.

6. Boat Pose With Pulse

The boat pose is great for your lower abs, and adding in a pulse just activates more muscles in the area, so it’s perfect for burning out your abs at the end of a workout. Sounds fun, right? Start in a seated position and rock back so you’re basically sitting on your tailbone (you’ll want a mat for this). Raise your feet up with a bend at your knees and lift your chest while raising your arms out in front of you. Again, your body should look like a V-shape. Then, keeping your hands extended toward your feet, pulse them up and down while keeping your core tight. Try to hold for a minute, alternating between holding the pose and pulsing your hands. You’ll most likely be cursing toward the end, but eventually it’ll get easier. But like, no promises.

Read: The At-Home Leg Workout That Will Make Your Butt And Legs Look Amazing